It took me a hot minute to figure out how to put make up on my eyes. It’s not like I have no idea that I am Asian… but even though I watched tutorial after tutorial, I couldn’t figure out how to make those looks translate on my face and flatter me.
I used to have an unhealthy relationship with make up, and just my appearance in general. I wrote a confession piece about my issues with eyelid glue/tape in my past, but now I’m happy and confident without make up… but I also love playing with eye shadow!
If you have hooded eyes, or even monolids… I gotchu boo. Here’s how to do western make up on ’em… Let’s Play!
Things you’ll need
- Eyeshadow. Ideally a neutral toned palette for this everyday look. For this look I will be utilizing the Too Faced Chocolate Bar Palette. Ideally you want a formula that is blendable above all, because you want it to be goof proof. It takes more geometry and foresight than doing make up on a different eye shape.
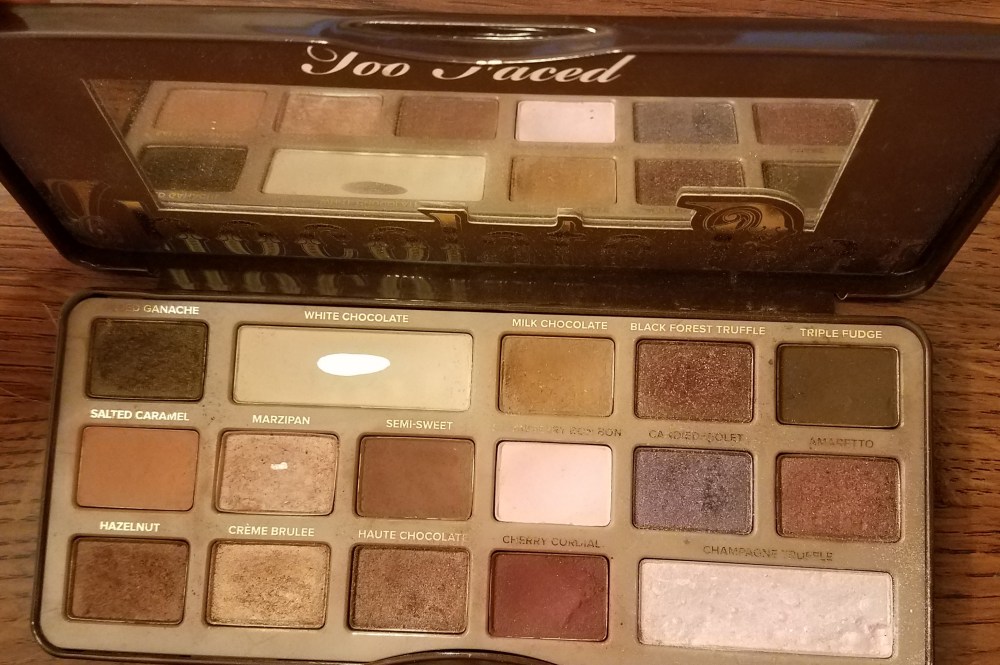
Obviously well loved… and smells like chocolate! YUM - Brushes. If you have those little felt, sponge-tipped applicators… you’re not going to get a great look. ESPECIALLY if you have monolid eyes. Invest in some blending brushes, and there are great affordable ones as well from ELF and real techniques if you’re on a budget. Here are the brushes that I personally use:

Mapping out the Monolid eye

The area between the red and green lines is your play area with the majority of your eyeshadow. Depending on if your eyes are hooded, or true monolids, you will have more or less space in this area. The area between your eyeball and the red line you will put eyeshadow, but it won’t show up when your eyes are open.

Even if you have hooded eyes, and have a true crease, this area where you can feel your brow bone is were you will blend your transition shade. (which if you’re like… “wtf is that??” no worries we’ll get into it)
Step 0: Prep your eyes!
This step should happen before your eye look if you want the colors to be vibrant, or if you want it to last. You can use something specifically made for priming (especially for oily eye lids) such as the Urban Decay primer potion, or the Milani Eyeshadow Primer. Or if oily eye lids aren’t as much of an issue, you can utilize concealer or foundations that you can’t use on the rest of your face to prime your eyes.
After this step, I set the primer with a translucent powder, or a light shade such as White chocolate so that blending is nice and easy.

Step 1: Transition Shade

Definition of a transition shade: The internet defines it has a shade to blend 2 shades together. In this context, it is used to add a gradient effect from your skin tone, to the darker shadows we will be adding.

Use a big fluffy tapered brush to apply a light colored shade between your brow bone (green line) and your natural crease(red line). Use light pressure, and build up the color so that it is darkest in the center, and shears out to almost nothing as it goes out toward the brow bone. Take the shade towards the inner corner of your eye as well, and it might look silly but no worries! This step doesn’t have to be super precise!
Step 2: Define the crease


This step is the hardest to get the hang of.
If you have monolids I would recommend taking a small smudge brush, which you can see looks like a concealer brush. I believe this is meant for smudging out the lower lash line, but works well for this purpose.
If you have hooded eyes, you can use a small detail crease brush.
Take a light, neutral, matte shade such as “semi-sweet” and with light pressure follow where you want your crease to be defined. I pick a line between the brow bone and my natural crease. Depending on your eye shape you could define slightly below the brow bone, but for me who has a lot of space between my lashline and brows, it would like kinda weird. If you have hooded eyes I would place this “crease definition” line, slightly above your natural crease to make your eyes look more open. This step is the trickest, but when done well it can make you look more defined and natural.

Step 3: Define the outer edge


Take an averaged size tapered fluffy brush and a medium-dark shade such as “hazelnut” and stamp it into the “outer V” of the eye, until most of the product is down on the outer edge. Then, sweep the rest of the product onto the outer half of the lid.


Step 4: Blend The Edges
 At this point your eye look should look like this, you should see a gradient from light to dark going from your inner corner to your outer corner. The edges may look a bit harsh, so take some time to blend. Some people also go back in with a transition shade at this point to help blend everything together.
Step 5: Deepen the outer V


Going back to that outer V, I like to deepen up the color after blending everything else together. You can take a dark shade or a mix of dark shades such as Cherry Cordial or Triple Fudge lightly on a taped brush, and again stamp and blend it onto the outer V. This time, after most of the product is on the outer V, I run the brush into where I defined my crease, pushing more firmly as pictured on your right.

Step 6: Brighten the lid

Next, you want to brighten the inner half of the lid with a matte, or shimmery light shade. I used strawberry bon bon (which is a matte pink), but you can shimmer it up with a metallic shade here as well.

Step 7: Define the lower lash line & Water line
 I take that same smudger brush, or a small shadow brush and run semi-sweet (the crease shade) and some salted caramel (the transition shade) on my lower lash line.
.I also like to define mt water line with a light shimmer shade, but this step is completely optional. Some people prefer a nude liner for this step as well, and it’s great if your eyes look more tired in the mornings. Use gentle pressure as this area can be sensitive, and if you miss… you might get a colorful eyeball.
Step 8: Winged liner
Yes, I do winged liner on a daily basis. I know… it sounds hard, but I think at this point it’s harder for me not to do one. There are many tutorials about how to map where you put your wing compared to your nose and your eyebrow. I have short eyebrows, and a long face, so I just like to follow my lower lash line. I imagine if the angle of my lower lash line kept going up, how it would look and I draw my first line there. It also helps that when I place the shadow on my outer V, it follows the same trajectory.


Next, I draw a triangle. The triangle should not extend past the pupil of your eye. If you have hooded/monolid eyes, you don’t want to make the area under your natural crease look smaller or non-existent… so in general the liner should stay VERY close to your lash line after the pupil.

Fill in the triangle, and you’re ALMOST done with your liner. Like I said its important that the liner on the inner half of your eye stays close to the lash line. I use physician’s formula eyeliner which has a flexible but sturdy tip that can wiggle my lashes out of the way so I can draw this line, as pictured below.

The other alternative, if you’re terrible at drawing a straight line close to the lash line is to put product on the water line. If you gently lift your lid upwards (as pictured int he very attractive photo below) you can see a pinky white line between your eyeball and your lash line. Kajal or Kohl liners are perfect for staying all day in that upper waterline. But it is a bit scary the first time getting it on there.

And here’s the effect below with the liner in the water line with a Marc Jacobs liner.

After a little eye lash curling, some blush and lipstick here’s the final look!

Do you have a hard time with eyeshadow on monolid eyes? I hope this helps!
Stay happy and healthy!
– RicaIsHungry
PSTT! Want more eyeshadow looks? Suggestions for great formulas? Check out my other posts:


******FULL DISCLOSURE: This are my personal experiences and thoughts. I am not being paid by the brand or the company to review this product or talk about any claims. This product was not sent to me. Links in this post are a part of the amazon affiliates program.*******
